The journey of parenthood is filled with numerous milestones, each marking a significant phase in a child’s growth and development. One such milestone is knowing when to remove Doona Head Support and infant insert in your child’s car seat.
In this comprehensive guide, I will guide you on when to remove Doona head support and infant insert – From identifying the signs that your child is ready to have the infant insert and head support removed, to the safety guidelines that should be followed, and more.
Understanding the Doona Head Support and Infant Insert
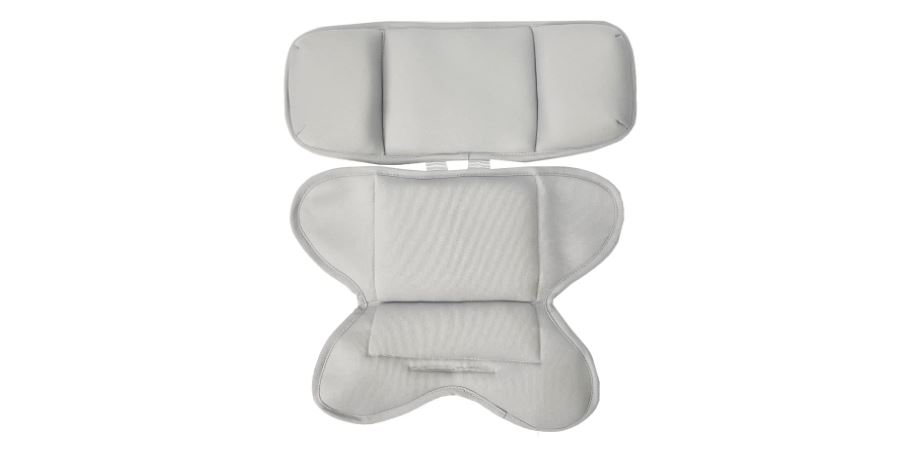
The Doona Infant Insert and Head Support are ingeniously designed to cater to the safety and comfort needs of newborns and young infants while traveling in a car.
The insert is a cushioned liner that fills the extra space in the car seat, providing a snug and secure fit for smaller babies. It’s essential for preventing excessive movement and jostling, which can be dangerous for fragile newborns.
The head support, on the other hand, is specifically designed to cradle the infant’s head, ensuring it remains in a safe and comfortable position, thus reducing the risk of injury.
Both the insert and head support are made from high-quality, breathable materials that provide comfort while ensuring safety. They are designed to not only protect in the event of a collision but also to support the infant’s developing spine and neck.
This thoughtful design is crucial for the first few months of a baby’s life when they are most vulnerable and unable to support themselves.
However, as your child grows, their physical development progresses rapidly. They gain neck and head control and start to outgrow the confines of these supports. This development is a clear indicator that it’s time to consider removing these additional supports.
It’s important to note that while these inserts provide essential protection for newborns, keeping them in place longer than necessary can lead to discomfort for your child and even compromise their safety.
In the next sections, we will explore the signs that indicate your child is ready for the removal of the Doona Infant Insert and Head Support, delve into the safety guidelines provided by Doona, and provide a step-by-step guide on how to remove these supports safely and efficiently.
Related: Can you use Doona without the base?
Signs Your Child is Ready for Head Support Removal
Recognizing when your child is ready to have the Doona Infant Insert and Head Support removed is a crucial step in ensuring their continued safety and comfort during car travels.
The readiness for this transition is not determined by age alone but by a combination of physical growth and developmental milestones.
Growth Milestones
The most straightforward indicator is your child’s size. The Doona Infant Insert is generally designed for babies up to a certain weight and height. Regularly monitoring your child’s growth can help you determine when they are approaching these limits.
It’s essential to refer to the Doona guidelines, which typically state the maximum weight and height for safely using the insert and head support.
Developmental Indicators
The development of neck and head control is a key factor. Around the age of 4 to 6 months, most infants develop enough strength in their neck and back muscles to hold their heads up independently.
This developmental milestone is crucial because the primary purpose of head support is to protect and support a baby’s head when they cannot do so themselves.
Comfort and Fit
As your child grows, you might notice signs that the insert is no longer fitting as comfortably as it used to. If your child seems cramped, or if their head is no longer resting comfortably in the head support, these are clear signs that it might be time to remove these supports.
It’s important to ensure that your child is not only safe but also comfortable in their car seat.
Related: How safe is the Doona car seat?
Safety Guidelines for Removing Doona Head Support
When it comes to removing the head support and infant insert from the Doona car seat, it’s important to follow the manufacturer’s guidelines and prioritize your baby’s safety.
Here are some safety guidelines based on the information I found:
- Follow weight and size recommendations: The infant insert is designed for smaller infants and should be used until your baby reaches a certain weight. According to Doona, the infant insert and head support should be used until your little one is about 11 pounds.
- Assess your baby’s comfort: If your baby seems uncomfortable with the head support in place, you can consider removing it. However, it’s essential to ensure that your baby is still properly supported and positioned in the car seat.
- Check the user guide: The user guide provided by Doona emphasizes not removing the head support while carrying your child in the car seat. Always refer to the specific instructions and safety guidelines outlined in the user guide provided with your Doona car seat.
Note: Every child is different, so it’s important to consider your baby’s individual needs and consult with a pediatrician or car seat technician if you have any concerns or questions about using the Doona car seat and removing the head support or infant insert.
Related: How long can a baby stay in a Doona car seat?
Step-by-Step Guide to Removing the Insert
Once you have determined that your child is ready for the removal of the Doona Infant Insert and Head Support, following a careful and methodical approach is crucial for ensuring ongoing safety.
1. Preparing for Removal: Before proceeding, ensure the car seat is not attached to the vehicle. This gives you the space and accessibility needed to remove the insert and head support safely.
2. Detailed Removal Steps: Begin by unfastening the car seat’s harness and removing any additional attachments or accessories connected to the insert or head support. Gently lift the head support out of the car seat, followed by the infant insert. It’s important to handle these components gently to avoid damaging the car seat.
3. Post-Removal Adjustments: After removing the insert and head support, you’ll likely need to adjust the harness and seating settings. The harness should be at or just above your child’s shoulders, and the chest clip should be at armpit level. Ensure that the harness is snug enough so that you cannot pinch any slack between your fingers.
Common Mistakes to Avoid
In the process of removing the Doona Infant Insert and Head Support, parents can inadvertently make a few common mistakes. Being aware of these can help ensure the continued safety and comfort of your child.
1. Removing the Insert Too Early or Too Late
One of the most common mistakes is misjudging the timing for removal. Removing the insert too early can compromise your child’s safety, as they might not yet have the necessary head and neck control.
Conversely, keeping the insert for too long can lead to discomfort and even safety issues if your child has outgrown it.
2. Ignoring Signs of Discomfort or Poor Fit
Parents should be vigilant about their child’s reactions and comfort in the car seat. Discomfort or a poor fit can not only make car rides unpleasant for your child but also potentially impact their safety.
Regularly check for any signs of discomfort and adjust the car seat settings as needed.
3. Failing to Adjust Car Seat Settings Appropriately
After removing the insert and head support, it’s crucial to reconfigure the car seat settings. The harness height, chest clip position, and strap tightness all need to be adjusted to suit your child’s current size and ensure their safety.
Recommended: How long can you use the Doona car seat?
After Head Support and Insert Removal: Ensuring Ongoing Safety and Comfort
Once the Doona Infant Insert and Head Support are removed, your focus should shift to maintaining your child’s safety and comfort in their car seat.
1. Adjusting Car Seat Straps and Settings: With the removal of the insert and head support, the car seat will now accommodate your child differently. It’s important to adjust the straps so that they are at the correct height and tightness. The harness should be snug against your child’s body, and the chest clip should be at armpit level.
2. Monitoring Your Child’s Comfort and Support: Without the extra padding of the insert, some children might find the car seat less comfortable. Monitor your child’s reactions during car rides and consider using approved car seat padding or adjusters if necessary.
3. Considering the Next Stage of Car Seat Transition: As your child continues to grow, you’ll eventually need to consider transitioning to the next stage of car seat. Keep an eye on your child’s size in relation to the car seat’s limits and start researching the next stage in advance.
Peradventure you removed the head support at the wrong time and wish to install it back, the next subheading shows you how to install it.
Doona Head Support Install
Installing the head support for a Doona car seat is a relatively straightforward process, but it’s crucial to ensure that it is done correctly for the safety of your child. Here is a step-by-step guide:
1. Prepare the Car Seat: Before installing the head support, ensure the Doona car seat is placed on a flat, stable surface. It’s easier to install the head support when the car seat is not attached to a vehicle or stroller.
2. Locate the Head Support: The Doona head support is usually a padded, contoured piece designed to fit around the child’s head and neck. It should be compatible with the design of the car seat.
3. Position the Head Support: The head support should be positioned so that it cradles the baby’s head and neck comfortably. For a newborn or a very young infant, it should be placed at the lowest setting. The top of the head support should be at or just below the top of the baby’s head.
4. Attach the Head Support: Most Doona head supports have slots or clips that align with corresponding clips or anchor points on the car seat. Slide the head support into these slots or fasten the clips securely. Ensure that it is firmly attached and there is no risk of it shifting or detaching.
5. Adjust for Fit and Comfort: Once installed, you may need to adjust the head support to ensure it fits snugly around your baby’s head without being too tight or too loose. The goal is to provide support and protection without causing any discomfort.
6. Check Stability: After installation, gently tug on the head support to make sure it’s securely in place and won’t move or become dislodged.
7. Final Safety Check: Once the head support is installed, place your child in the car seat and adjust the harness. Ensure the head support does not obstruct the harness and that the harness can still be properly and securely fastened.
Conclusion: When To Remove Doona Head Support
Transitioning your child out of the Doona Infant Insert and Head Support is a significant milestone. It marks a period of growth and development in your child’s life.
By following the guidelines outlined in this article, you can ensure that this transition is smooth, safe, and comfortable for your child.
Remember, the key to successful car seat use at any stage is adherence to safety guidelines, being attentive to your child’s needs, and staying informed. Your vigilance and informed decisions will contribute significantly to your child’s safety during every car journey.